Tortitas de Santa Clara: Cookies to celebrate Cinco de Mayo
Pastry chef Shelly Acuña Barbera has worked in Michelin-starred kitchens in New York and now bakes at Little Bread Pedlar in London, but her sweets are rooted in her Los Angeles upbringing.
Barbera’s parents came to the U.S. from Jalisco, Mexico, and her mom used cooking, baking and eating as ways to share stories of her heritage with her children. As Barbera and her brother grew older, her mom realized that many of the “Mexican” celebrations in California, most notably Cinco de Mayo, bore little resemblance to what she knew from her own upbringing. Cinco de Mayo is an important date — it’s when the Mexican army defeated the French at the Battle of Puebla in 1862 — but it’s not considered as significant as is the country’s independence day on Sept. 16.
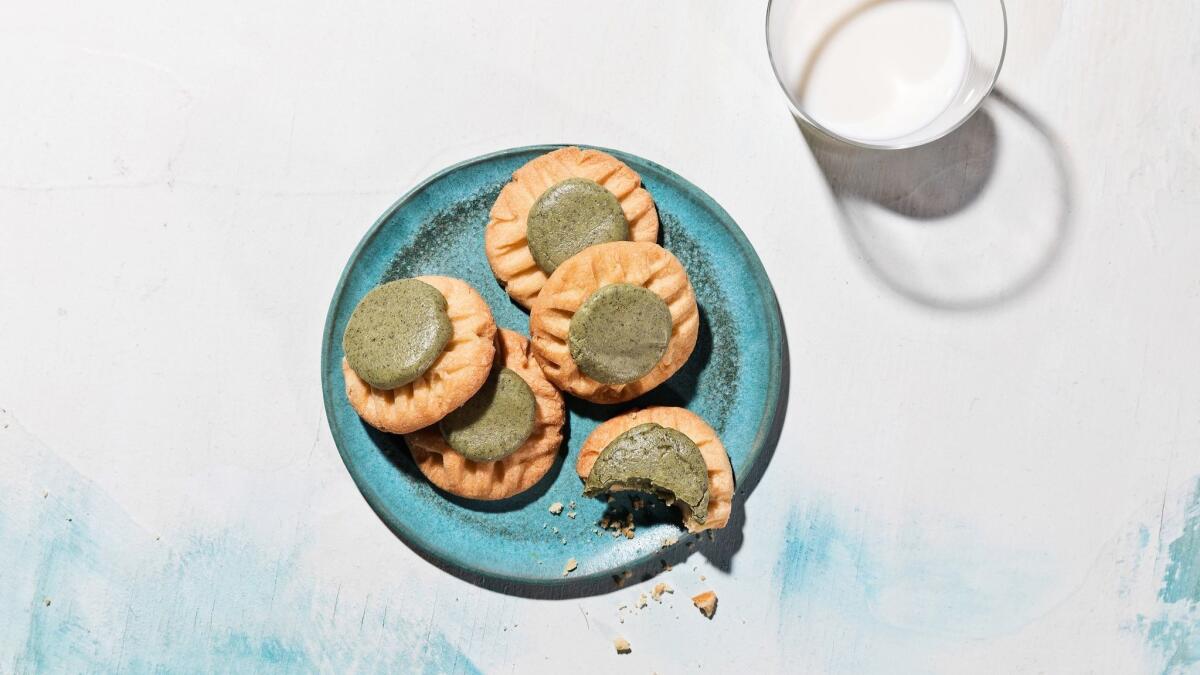
Rather than ignore Cinco de Mayo, Barbera’s mom used it as an opportunity to teach her kids more about it. Barbera’s mom remembered traveling to Puebla as a small child and enjoying the tortitas, which originated in that city’s Santa Clara convent. Barbera said, “My mom knew Cinco de Mayo was more than just tacos and margaritas — even though there’s nothing wrong with that! — so she started to make tortitas de Santa Clara so we could experience a traditional food from Puebla to commemorate Mexico’s victory in that city.” The confections are a cross between cookie and candy with a small buttery shortbread shell and a chewy candy-like pepita filling.
Barbera remembered, “I love this cookie because it reminds me of growing up in L.A. and baking with my mom. Tortitas de Santa Clara are not commonly found in L.A. — or at least they weren’t while I was growing up — so we came up with our own version. Every time my mom and I made them together, we adjusted the recipe. First, we swapped lard out for salted butter and then we changed the shape. The tart reminded me of a large thumbprint cookie, so we eventually started shaping them as thumbprints.”
Barbera carries on her family tradition of tortitas de Santa Clara now that she’s on the other side of the Atlantic — a remembrance of her roots in each batch.
Tortitas de Santa Clara
View this recipe and more in our California Cookbook »
1 hour plus chilling and cooling. Makes 2 dozen.
- 1 cup raw pepitas (pumpkin seeds)
- 12 tablespoons salted butter, room temperature
- 2/3 cup powdered sugar
- 1 teaspoon pure vanilla extract
- 1 1/2 cups all-purpose flour
- 4 tablespoons whole milk
- 1 cup granulated sugar
1. Heat the oven to 300 degrees. Line 2 large baking sheets with parchment paper.
2. Spread the pepitas on an unlined rimmed baking sheet. Bake until fragrant, 5 to 7 minutes. Cool completely on the sheet. Raise the oven temperature to 350 degrees.
3. Meanwhile, cream the butter, powdered sugar and vanilla together in a large bowl with an electric mixer on medium-high speed until light and fluffy, 3 to 5 minutes. Scrape the bowl and turn the speed to low. Gradually add the flour and beat just until incorporated, then beat in 1 tablespoon milk until smooth.
4. Divide the dough into 24 even pieces and roll each into a ball. Arrange the balls 2 inches apart on the prepared baking sheets. Using your thumb or the handle end of a wooden spoon, make a round indentation in the center of each ball. Press the tines of a fork against the edges of each round to imprint decorative lines. Refrigerate until the dough is firm, 15 to 30 minutes.
5. Meanwhile, puree the cooled pepitas in a food processor until they become a soft, smooth paste, about 5 minutes. While the pepitas are processing, combine the granulated sugar and 1/4 cup water in a large saucepan. Cook over medium-high heat, swirling the pan occasionally to evenly cook the sugar, until a candy thermometer registers 250 degrees, about 5 minutes. (Tilt the pan if needed for the thermometer to register the temperature.) Remove from the heat and carefully add the pepita paste. Stir until smooth. When the mixture stops steaming, stir in the remaining 3 tablespoons milk. Set aside to cool completely.
6. Bake the cookies, one sheet at a time, until golden brown around the edges, 13 to 15 minutes. Cool on the sheets on wire racks. Put a tablespoon of the pepita filling in the thumbprint center of each cookie and spread into an even round. Let stand until the tops of the filling are dry to the touch, about 15 minutes.
Make Ahead: The cookies can be stored in an airtight container at room temperature for up to 3 days.
More to Read
Eat your way across L.A.
Get our weekly Tasting Notes newsletter for reviews, news and more.
You may occasionally receive promotional content from the Los Angeles Times.
