Relax, Dear, It’s Only Dinner
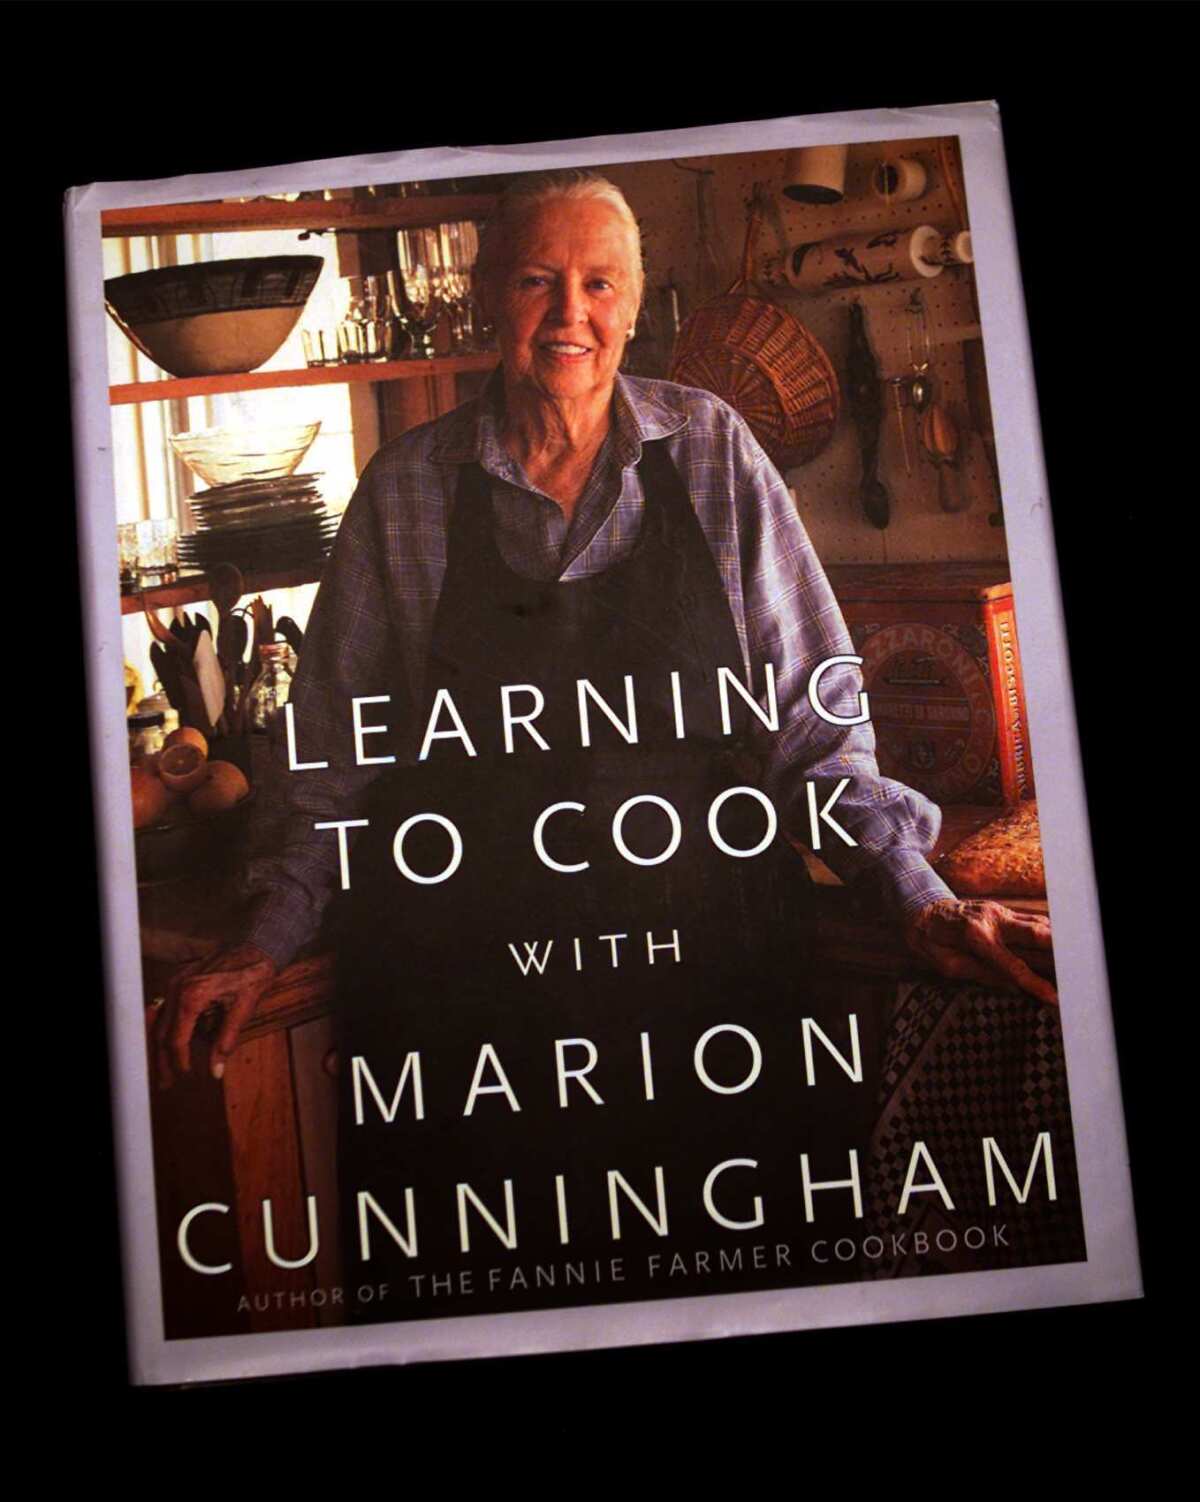
Editor’s note: Marion Cunningham, who died Wednesday at 90, was one of the most outspoken voices in favor of American home cooking. This is a story she wrote for us in 1999, based on her final cookbook “Learning to Cook With Marion Cunningham,” published by Alfred A. Knopf.
If cooking is really so hard, how did all those pioneer women manage to feed troops of people with not much more equipment than one big pot hung over an open fire? It’s far easier to turn out a simple meal today.
So you can learn to cook! And, believe it or not, you’ll probably come to enjoy it.
Here are five simple truths that will help you along the way:
1. Always read through a recipe and check to see that you have all the ingredients you need before you begin. For some reason, people don’t like to do this, but it will save you time and energy--and anxiety--if you have all your ingredients at hand before you start.
2. Decide what you’re going to make for the complete meal and see if there is anything you can do ahead, such as preparing your dessert, or making the salad dressing and washing the greens. Then figure out what parts of the dinner are going to take longest and determine when you should start the preparations. If there are unfamiliar techniques involved in a recipe, read the introductory material and the instructions carefully so that you’ll understand every step.
3. The most important habit you can develop (and somehow, many home cooks never seem to) is to taste as you are preparing something. Take a sample and taste it critically at different stages of the cooking, then “correct the seasonings,” as recipe instructions often put it. What you want to achieve is a balance of flavors. Haven’t you often tasted something you are prepared to enjoy and found it disappointingly flat? Then suddenly a shake of the salt cellar makes it come alive. The only way to learn this all-important aspect of cooking is to keep tasting and figuring out just what’s needed. It will make the difference between a mediocre and a delectable dish.
4. I often hear home cooks complain, “I don’t mind cooking, but I hate the mess afterward.” That’s just a result of poor planning--of leaving everything to the end, letting the mess pile up and allowing food to harden so that everything is difficult to clean.
When I was teaching children to cook, the first lesson they learned was: “Wash your hands and fill a big friendly bowl with sudsy hot water.” Well, the lesson wasn’t just for children. I wouldn’t be without that bowl of sudsy water in my sink. It’s so simple: As you’re going along, just drop every utensil and pot you’ve used into that bowl. When everything has soaked a few minutes, wash it up, rinse it and let it drain while you continue your cooking.
5. It is hard to know how much food will comfortably serve how many people. My rule of thumb is, when in doubt, cook more than you think you may need. After all, one of the joys of home cooking is having leftovers for the nights when you come home tired and want to fix something quick and simple. Home cooks don’t think of one recipe at a time but of what may be needed throughout the week, and those treasures in the refrigerator can provide inspiration for another meal.
CAKE
Foolproof Dessert Magic
This is a first-rate dessert for two reasons. First, you will learn some good basic steps in baking: beating egg whites and folding them into batter (it’s a forgiving recipe, so even if you don’t do everything perfectly, your dessert will be wonderful). Second, this dessert goes through a magical transformation: As it bakes, it creates a creamy lemon custard and a tender layer of cake. Amazing!
Lemon Pudding Cake
Active Work Time: 15 minutes * Total Preparation Time: 40 minutes
1 cup sugar
1/8 teaspoon salt
1/4 cup all-purpose white flour
1/4 cup (1/2 stick) butter
3 large eggs
2 or 3 lemons (enough to make 1/3 cup freshly squeezed juice)
Grated zest from 1 lemon
1 1/2 cups milk
Nonstick cooking spray or 2 teaspoons softened butter (for greasing pan)
* Preheat oven to 350 degrees.
* Put 3/4 cup sugar, salt and flour in mixing bowl and stir with fork until mixed together.
* Melt butter in small saucepan over medium-low heat. Add to flour mixture and stir to mix.
* Separate egg whites from yolks, making sure there is no yolk with the whites. Put whites in clean medium-size glass or metal bowl. Add yolks to flour mixture and beat with whisk or beater.
* Squeeze lemons. Add lemon juice and zest to flour mixture.
* Add milk to flour mixture. Stir until all ingredients are mixed together and batter is uniform color. (Note: This batter is very thin and liquid and doesn’t look like the cake batter you may be used to seeing--but fear not, it will work.)
* Beat egg whites, adding remaining 1/4 cup sugar until color of whites changes from clear to white and whites form soft peaks.
* Fold whites into batter.
* Grease 8-inch-square baking pan with nonstick cooking spray or butter. Set this pan in large baking pan that you have placed on middle shelf of oven. Pour into large pan enough warm water to reach halfway up sides of cake pan.
* Set timer for 25 minutes and bake.
* When timer rings, check to see if cake is done. It should be golden color. Insert toothpick into center of cake about 1/4 inch deep (cake layer is about 1-inch thick and pudding is underneath, so all you have to probe is cake layer). If toothpick comes out clean, cake is done; if there is wet cake batter on tip, let cake bake another 5 minutes and test again.
* When cake is done, remove from water bath and turn oven off. Leave water bath in oven to cool.
* To serve, spoon portion onto dessert plate and add scoop of whipped cream to each portion.
6 servings. Each serving: 284 calories; 190 mg sodium; 131 mg cholesterol; 11 grams fat; 41 grams carbohydrates; 6 grams protein; 0.01 gram fiber.
SEPARATING EGGS
Using your hands: Crack the egg on the side of one small bowl, put the raw egg in your hand and use your fingers as a strainer, allowing the egg white to fall into the bowl while the yolk remains in your hand. Set the yolk aside in another bowl, then transfer the white to a clean glass or metal bowl for beating.
Using the shell: Crack the egg on the side of one small bowl. Carefully pull the halves apart. Your goal is to get most of the white into the bowl, keeping the yolk in one half of the shell. As you pull the shell apart, some of the white will fall into the bowl. Now tip the yolk to the edge of the shell and some more of the white will fall into the bowl. Keep moving the yolk from one shell to the other, letting the white fall away. Usually if you do this two or three times, you will have only a little white left on the yolk, which doesn’t matter. Set the yolk aside in another bowl, then transfer the white to a clean glass or metal bowl for beating.
The reason for breaking the whites into one bowl and then transferring them to another before breaking another egg is that egg whites won’t beat well if there is any yolk in them. This way, if you happen to get a little yolk along with the white with one egg, you can throw it away without having spoiled any perfectly good whites.
BEATING EGG WHITES
First, wash and thoroughly dry a large glass or metal bowl--don’t use a plastic bowl, which can retain a greasy film. The bowl has to be free of any oil or grease for the whites to beat properly. Then put the egg whites in the bowl and beat them with an electric standing mixer or an electric hand-held mixer. You can also beat by hand using a balloon whisk, but it takes quite a bit of brisk beating.
If you’re using an electric mixer, attach the wire whisk and start beating the whites on low speed. As the whites become foamy, increase the speed. When they are thick enough to form peaks, but while they are still shiny and moist, scoop up some of the whites in a rubber spatula; if the peaks keep their shape on the spatula, the whites are ready to be folded into the batter. This stage (“stiff and moist”) is the perfect point of doneness for beaten egg whites.
FOLDING WHITES
Folding the whites into the batter is a gentle process. You want to combine batter and beaten egg whites without losing the air in the whites. Using a rubber spatula, scoop up half the whites and put them on top of the batter. Now, using the edge of the spatula, cut down to the bottom of the bowl and bring up some batter so it is on top of the whites. Turn the bowl a quarter turn and repeat, cutting down and bringing some batter up over the egg whites again. You are gently making a circle or loop by going from the edge of the bowl along the bottom to the center of the bowl, bringing the spatula up, and folding some batter over the whites gently. Repeat this process just until the whites and batter become one. Don’t fuss if you see a little streak of white here and there that has not been incorporated; as long as most of the batter and whites are blended, you’ve done it right.
POTATOES
Perfectly Mashed
There is a world of difference between instant mashed potatoes and your own homemade. The trick to making creamy mashed potatoes is heating the milk and butter together before you start the mashing. Note that you can keep the potatoes warm for up to an hour if you want to cook them ahead.
Mashed Potatoes
Active Work Time: 15 minutes * Total Preparation Time: 30 minutes
6 medium baking potatoes
1 cup milk
1/4 cup (1/2 stick) butter
Salt
Freshly ground pepper
* Peel potatoes and cut into quarters. Put in pot and add just enough cold water to cover them. Turn heat to high, bring to boil, and cook gently 15 to 20 minutes. Turn heat down to medium-high if water bubbles too violently. Potatoes are done when a fork pierces them easily.
* Near the end of potato-cooking time, put milk and butter in small pot and heat over medium heat until butter melts. Don’t let milk boil; you just want it hot.
* When potatoes are done, drain in colander set in sink. Shake to remove all excess water.
* Put drained potatoes in bowl and mash briskly with potato masher or fork, slowly adding half of hot milk and butter as you do. Move potatoes around in bowl while mashing to get at every bit. When big lumps disappear, add more milk--a little at a time--just until all lumps disappear and potatoes smooth out. (Moisture content of potatoes varies, so it is hard to know in advance exactly how much milk and butter you will need.)
* When lumps are gone, whip potatoes with whisk or fork until as smooth as you like. Add salt and pepper to taste.
* Serve immediately in same bowl. Or, if you want to keep potatoes warm for up to an hour before serving, cover bowl with foil and put bowl in 200-degree oven.
* You can mash and beat potatoes with electric stand mixer or hand-held electric mixer. Don’t use food processor, which will turn potatoes into gummy gray mess.
6 servings. Each serving: 176 calories; 154 mg sodium; 24 mg cholesterol; 9 grams fat; 22 grams carbohydrates; 4 grams protein; 0.29 gram fiber.
MASHED POTATO TECHNIQUE
SEASONING WITH SALT AND PEPPER
You have probably always known how much salt and pepper you like to add to the food you are eating at the table. It’s the same when you’re cooking. Just remember to add seasonings a bit at a time, and taste in between to avoid overdoing it.
On the other hand, when you’re making soup, stew, beans or anything else that is cooked a long time in liquid, you should add less salt at the beginning than you think you’d want, because part of the liquid will evaporate as it cooks and the salt flavor will become intensified. At the end of cooking, taste the result and, if necessary, add a little more salt to please your palate.
SALAD
Doing Right by Greens
Nothing is simpler than salad, so it’s surprising how often it gets poorly made. What a shame. Something as basic as delicate Boston or butter lettuce mixed with peppery watercress adds a lot to a meal. Use the stems of the watercress if they are tender, but taste first and discard them if they are coarse and tough.
*
Watercress Salad
Active Work and Total Preparation Time: 15 minutes
THE SALAD
1 head butter or Boston lettuce
1 bunch watercress
* Cut core out of butter lettuce and discard. Separate leaves, rinse and pat dry.
* Remove leaves from stems of watercress. Discard stems. Rinse and dry leaves.
* Chop half of watercress leaves--about 1/2 cup--and set aside to use in Watercress Dressing. Combine remaining watercress and lettuce greens in large bowl. Cover greens with damp paper towel and refrigerate while you make Watercress Dressing.
WATERCRESS DRESSING
2 tablespoons white wine vinegar
1 tablespoon water
1/2 teaspoon salt
2 green onions
1/2 cup olive oil
Reserved watercress leaves
* Combine vinegar, water and salt in jar. Screw on lid and shake until salt dissolves.
* Trim roots from green onions. Chop onions and add along with olive oil and reserved watercress leaves to jar.
* Fasten lid again and shake well. Dressing will look cloudy after shaking, which means it is thoroughly mixed.
ASSEMBLY
* Pour half of Watercress Dressing over bowl of greens.
* Toss leaves gently, preferably with your hands, going repeatedly to bottom and sides of bowl to coat all leaves.
* Taste, salt to taste and toss again.
* Serve cold.
4 servings. Each serving: 247 calories; 300 mg sodium; 0 cholesterol; 27 grams fat; 2 grams carbohydrates; 1 gram protein; 0.27 gram fiber.
SALAD TECHNIQUE
* Rinse all raw ingredients in cold water before starting.
* Dry greens as soon as you rinse them; dressing won’t adhere to wet lettuce. Either pat the greens dry with towels (either paper or cloth) or dry them in a salad spinner, which is a handy piece of kitchen equipment.
* If you decide to buy a salad spinner, be sure to get the type that is spun by pulling a cord. To use the spinner, pack the greens loosely into the spinner bowl, and pull the cord sharply about 10 times. Pour out the water that has accumulated at the bottom of the spinner bowl before spinning another batch.
* The best way to store the greens is to put them in a plastic bag after they have been rinsed. Leave some head space before closing with a twist tie.
* If you are using an oil-based dressing, the rule of thumb is that 1 tablespoon will coat 2 cups of salad greens.
* Don’t put the dressing on salad greens until you are ready to serve or they will wilt. However, if you’re making a salad of cooked ingredients, toss the ingredients with the dressing an hour or more before serving, so they can become nicely flavored.
* Add only enough dressing to give a shiny coating to the greens.
CHICKEN
A Bird That Practically Cooks Itself New cooks are often intimidated by the idea of roasting a chicken, but nothing could be easier. If you put some vegetables in the same pan and roast everything for about an hour, you will have a moist, golden bird and savory accompaniments, all ready to eat at the same time. While they cook, you can set the table, watch the news, maybe make a dessert. Sometimes it’s handy to roast two chickens at the same time; it takes no extra effort, and you will have plenty of leftovers for salads, soups and sandwiches.
Roast Chicken With Vegetables
Active Work Time: 15 minutes * Total Preparation Time: 1 hour 15 minutes
8 carrots
2 onions
8 small white or red boiling potatoes (about 1 1/2 inches in diameter)
3 teaspoons salt
1 1/2 teaspoons black pepper
4 sprigs fresh or 1 tablespoon dried rosemary
1 (3- to 4-pound) whole chicken
* Preheat oven to 425 degrees.
* Peel carrots and cut crosswise into 1 1/2-inch-long pieces. Cut thicker pieces in half lengthwise as well.
* Peel each onion and cut into quarters.
* Wash potatoes under cold water to get rid of any dirt. Leave them whole and unpeeled.
* Scatter carrots, onions and potatoes on bottom of 13x9-inch baking or roasting pan. Sprinkle 1 1/2 teaspoons salt and 1 teaspoon pepper over vegetables, and lay 2 sprigs rosemary on top. If using dried rosemary, put 1 tablespoon in palm of your hand and crumble over vegetables.
* Giblets, which consist of the liver, gizzard, heart and neck, are usually in a package inside the cavity of the chicken, between legs. Be sure to remove giblets before roasting; they may be discarded or refrigerated for another use later.
* If there is a pale-yellow chunk of fat on either side of cavity, pull or cut off and discard.
* Hold chicken under cold running water and rinse inside and out. Shake off excess water and pat dry with paper towels.
* Sprinkle remaining 1 1/2 teaspoons salt and 1/2 teaspoon pepper over outside of chicken, rubbing all over skin.
* Set chicken, breast side facing up, on top of some of the vegetables, with remaining vegetables surrounding bird.
* Insert dial-type (not instant-read) thermometer into thickest part of breast, taking care that rod of thermometer does not touch any bones.
* Put chicken in center of oven, set timer for 30 minutes and roast.
* When timer rings, remove pan from oven and, using large spoon, turn over vegetables that surround chicken. Don’t bother with vegetables under chicken.
* Return pan to oven and set timer for 30 more minutes.
* Take chicken out of oven again to check for doneness. Insert tip of small paring knife into meat where thigh attaches to body. If juices that run out are pink, chicken needs to continue cooking another 10 to 15 minutes. If juices are clear, chicken is done. Meat thermometer should show temperature of 170 to 180 degrees when done.
* Tent chicken with foil and set aside to rest 10 minutes. Carve chicken. Scoop vegetables out of roasting pan and transfer to serving platter. Remove fat from pan juices.
* Arrange cut chicken pieces on top of vegetables, spoon some pan juices over chicken and vegetables, scatter remaining rosemary sprigs on top, and bring dish to table for serving.
4 servings. Each serving: 620 calories; 1,970 mg sodium; 152 mg cholesterol; 31 grams fat; 42 grams carbohydrates; 42 grams protein; 2.62 grams fiber.
CHICKEN TECHNIQUE
CLEANING THE CHICKEN
The first step in preparing a whole chicken for roasting is to reach inside the chicken cavity and find the giblets. Sometimes they are in a little bag; sometimes they’re loose, and sometimes they are not included. The liver can be chopped and quickly cooked in a little butter or oil in a skillet, then added to an omelet or just eaten by itself as a treat. The remaining giblets (heart, gizzard and neck) can add flavor to a soup. If you don’t care to use them, cook them up for the dog.
CARVING THE CHICKEN
If your chicken truly is cooked enough, it should be easy to remove the meat. Set the chicken breast side up. Pull the leg and thigh back to expose the joint that attaches it to the body. Use a sharp paring knife to probe for the socket and cut through it, separating the leg and thigh from the carcass. Repeat with the other leg and thigh. Use the knife to cut through the joint that connects the leg to the thigh. Pull off the wings by gently twisting them away from the carcass. The breastbone runs along the top center of the chicken carcass. Feel for it with your fingers. Make a slit along both sides of the breastbone and dig your fingers into one of the slits and peel the entire half of the breast meat off the carcass. Do the same to remove the breast meat on the other side. Arrange the legs, thighs, wings and breasts on a platter and serve.
REMOVING THE FAT FROM A ROASTING PAN
If there is one food that symbolizes how good home cooking can be, it is baking powder biscuits. Measuring and mixing them is a snap; they don’t take more than 10 minutes to make and 12 minutes to bake, and you can easily make double the amount and freeze any that you aren’t going to use right away.
You will have learned a good basic lesson in baking when you get the hang of rubbing flour and shortening together with your fingertips until they are blended into small bits the size of grains of rice. The same technique is used to make pie crust.
These light, golden biscuits can transform the plainest supper. They can even do double duty. Serve them to accompany a main dish, or spread them with strawberries and whipped cream to make the classic American dessert strawberry shortcake.
Baking Powder Biscuits
Active Work Time: 10 minutes * Total Preparation Time: 25 minutes
1/3 cup vegetable shortening (such as Crisco), plus little extra for greasing pan
2 cups all-purpose white flour, plus extra for dusting hands and board
2 1/2 teaspoons baking powder
1 teaspoon salt
1 cup milk
* Preheat oven to 450 degrees.
* With fingers or paper towel, scoop up a little vegetable shortening and smear just enough to cover sides and bottom of 8- or 9-inch-diameter round baking pan.
* Put flour, baking powder and salt in large mixing bowl and mix well with fork. Add shortening and stir in, cutting it into flour repeatedly with fork tines or by hand until mixture has texture of coarse sand.
* Add milk to flour and shortening mixture and stir with fork just until milk is mixed with other ingredients and there are no dry streaks of flour left. Don’t mix too much. Dough should remain moist and sticky, which will make these biscuits rise high and have tender texture.
* Sprinkle about 1/4 cup flour on large cutting board or smooth counter top and spread out in circle. Coat hands with flour, then scoop dough from bowl and place on floured surface.
* Knead dough until smooth and pat into rough circle about 8 inches in diameter and 1/2 inch thick.
* You can cut biscuits into any size or shape you like. I use a 2-inch round cookie cutter. If you don’t have one, use rim of small drinking glass to cut dough. You can also pat dough into square and use knife to cut square biscuits.
* Press cookie cutter firmly into dough at edge of circle, and then lift straight up. Repeat this step, cutting next circle close to first, until you have cut as many biscuits as possible from dough. Place rounds in greased baking pan, leaving a little room between them.
* When you have cut as many circles as you can from dough, you will have some scraps left. Gather together and pat dough (do not knead) into small circle, same thickness as before, and cut out as many biscuits as you can. Add to baking pan.
* Put pan on center rack of oven and bake.
* After 12 minutes, check to see whether biscuits are done. They should be golden brown on top. Break 1 open to see if it is cooked through and not sticky in center. If dough feels sticky and damp, continue to bake another 3 to 5 minutes.
* Take biscuits out of oven and let sit about 3 minutes to cool just slightly. Remove from pan with spatula and either serve immediately or store, tightly wrapped, for later use. Biscuits should always be served warm, so if they have cooled, reheat in preheated 350-degree oven 5 to 6 minutes.
16 (2-inch) biscuits. Each biscuit: 98 calories; 221 mg sodium; 4 mg cholesterol; 5 grams fat; 12 grams carbohydrates; 2 grams protein; 0.04 gram fiber.
MEASURING THE SHORTENING
To measure shortening, use a spoon to scoop up the shortening from the can and press it into a measuring cup. Pack it down firmly as you fill the measuring cup, and level it off with a knife. Use your fingers to remove the shortening from the measuring cup, scraping around the sides and the bottom to get it all out.
FROM BISCUITS TO SHORTCAKE
It is a breeze to make strawberry shortcake with biscuits. To serve 4 people, buy 1 quart of strawberries (4 cups). Rinse them, discard the green stems and leaves, and slice them. Put the slices in a bowl and sprinkle 1/2 cup of sugar over them. Use a fork to toss and turn the slices so they are coated with sugar. Then add 1 tablespoon sugar to 3/4 cup whipping cream and beat it with whisk or beater until thickened (this will give you 1 1/2 cups whipped cream).
The last step in this easy dessert is to split each baking powder biscuit in half and place each half, cut side up, on a dessert plate (it is a nice touch to warm the biscuits, if they have gotten cold, before assembling them with the strawberries and whipped cream). Now pile a quarter of the berries over the two biscuit halves. Spoon a quarter of the whipped cream on top. There will be a little strawberry juice in the bottom of the bowl. Drizzle a bit of the juice over each serving.
KNEADING BREAD OR BISCUIT DOUGH
Press down on the dough with the palm of one hand and push it away from you (if it is more comfortable, use both hands to push the dough). The dough will stretch into an oval shape. Lift the far end of the oval and fold it in half back toward you. Give the dough a quarter turn and press and push it away again. Repeat these steps about 10 times, using a light hand, until the dough feels smooth and silky. If the dough sticks, sprinkle on a little more flour.
CUTTING SHORTENING INTO BISCUIT OR PIE DOUGH
Combine flour and other dry ingredients (sugar, salt, baking powder, etc.) in a large mixing bowl. Add 1/3 cup shortening in one piece and roll it around in the flour to make it less sticky. Break up the single lump of shortening into 4 or 5 smaller pieces and coat each of them with flour mixture.
Now you need to turn the few big clumps of shortening into many tiny lumps that are distributed throughout the flour. Plunge your hands into the bowl and pick up a lump of shortening and some flour. Lightly rub the shortening and the flour between your thumbs and fingers and let the blended flour and shortening fall back into the bowl. Repeat over and over, reaching to the bottom of the bowl and scooping up some loose flour, then rubbing it and the shortening into irregular bits. Work lightly--don’t squeeze the dough too hard. After a few minutes, when the dough has the look and feel of coarse sand, you will know that you have worked it enough.
Tools of the Trade The following list of kitchen equipment will serve your basic needs. As you graduate into cooking more and varying your repertoire, you will slowly add to this beginning list.
I have not included fairly expensive electric equipment, such as a food processor, a blender or a standing mixer. But you might want to invest in a mini-food processor and a hand-held electric mixer just to make chopping, mixing and whipping quicker and easier.
2-quart saucepan with lid
6-quart saucepan with lid
8-inch frying pan with lid
10- or 12-inch saute pan with lid (straight-sided, heavy-bottomed pan about 2 1/2 to 3 inches deep)
12x17-inch roasting pan (You need a good-sized one for cooking vegetables alongside a roast.)
8-cup oven-proof casserole
Paring knife
7- to 8-inch chef’s knife
Bread knife with serrated edge
Plastic or wooden chopping board
2 rubber spatulas: one small and one standard size
Metal spatula
Wooden spoon
Large metal spoon
Stainless-steel slotted spoon
2 wire mesh strainers: one 3 inches in diameter, one 7 inches
Colander
Flat hand grater
Citrus juicer
Soup ladle
Potato masher
Tweezers (great for removing small fish bones)
Roasting thermometer (The one with the large face that you insert in the meat before cooking; the smaller instant-read thermometers, which you insert in different parts of the meat at the end of cooking for a quick reading, are very accurate, but too often beginners have been known to leave them in the oven and they melt. So play it safe.)
Bottle opener
Can opener
Set of measuring spoons: 1 tablespoon, 1 teaspoon, 1/2 teaspoon, 1/4 teaspoon
1- and 2-cup liquid measuring cups with spout
1- and 2-cup jars with screw-on lids
8-inch wire whisk
For baking:
1-quart mixing bowl (in stainless steel, ceramic or glass)
3-quart mixing bowl (I prefer Pyrex, because you can see through it, and it is inexpensive and sturdy.)
8 small Pyrex cups (generally useful but particularly handy if you make popovers)
12-cup muffin pan
8-inch round cake pan
9-inch round cake pan
8-inch square cake or baking dish
13x9-inch baking dish
2 jelly roll pans (baking sheets with rims)
Set of dry measuring cups: 1/4 cup, 1/3 cup, 1/2 cup and 1 cup. (Dry measuring cups are usually metal with level tops, so you can level off dry ingredients to measure accurately.)
Large wooden rolling pin (a heavy one will do a much better job--about 17 inches long, with ball bearings, and weighing about 5 pounds)
Eggbeater
2 wire cake racks
2-inch round cookie cutter
Toothpicks (for testing doneness of baked goods)
ALSO:
Cookbook legend Marion Cunningham dies
Grilled flatbread with mushrooms from the new cookbook ‘Hero Food’
New in Pasadena: Trattoria Neapolis Italian restaurant and bar
More to Read
Eat your way across L.A.
Get our weekly Tasting Notes newsletter for reviews, news and more.
You may occasionally receive promotional content from the Los Angeles Times.

