Eco-Art: Take Trash and ‘Transform It Into Something Beautiful
- Share via
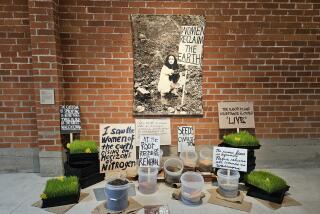
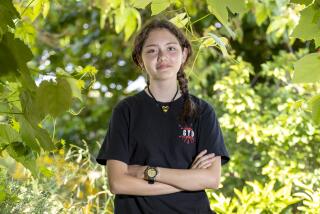
Self-described ecological artist Christy Shelton uses paper trash, picked up on walks and hikes and mixed with plant materials, to make the paper on which she draws, paints and stitches her images of nature. She teaches art, and her techniques, to students in Santa Monica schools.
What began as a habit of picking up trash during daily walks has become a conscious endeavor to collect trash. Displaying the trash in my art is not intended to aestheticize it but rather draw attention to the problem of waste in our communities.
I have always been concerned with nature; as a child I had ceremonial burials for animals. My work has natural energies, animal energies, landscape and plant energies. From there I became involved in organic farming. Plants and animals are always included in my work. Occasionally people are represented by grids and maps because they have left their mark in a linear way, whereas nature is organic.
I use organic non-toxic water-based egg tempera paints; oil-based paints are mined from the earth and mixed with turpentine. I left that painting technique behind with my romantic view of nature and wanted to be more realistic.
Since April is Earth month, I have my students collecting litter for their art projects, and at the same time making the earth a little more beautiful by picking up the trash. I encourage everyone to experiment with making paper from recycled materials. It is very satisfying to take something useless and to transform it into something beautiful.
Christy Shelton’s recipe for handmade recycled paper
This will make two approximately 5-by-5-inch pieces of thick paper.
Equipment and ingredients
You will need:
A household blender
3 cups water
3 cups paper (junk mail, flyers, menus, envelopes with see-thru window and glue removed, then torn in small pieces. Do not use heavy, glossy catalog paper) torn into small pieces.
A handful of organic material, such as banana peel or artichoke leaves (for the long fibers), flower petals, hay and dryer lint
3-lb. empty coffee can or other large can.
1 small empty coffee can with top and bottom lids removed (this will form a round shape for the paper. A square shape can be made by using a 5-inch by 5-nch wooden frame).
1 sponge for blotting
1 8-by-8-inch piece of screen stapled on a wooden frame or taped at edges
2 10-by-10-inch pieces of absorbent cloth (old sheet or T-shirt).
1 cookie sheet
1. Pour water and paper, torn into small pieces) into blender. Let stand for two minutes. Place lid on blender, turn on to blend or liquefy speed. to get multi-colored paper with visible paper fragments, blend for 10 seconds. For single-colored paper, blend for 30 seconds.
After the pulp has been made, you may add small amounts of the other organic materials for texture; experiment with this. Blend 5 more seconds.
2. Choose a shape for the paper (round coffee can or square wooden frame).
Place the screen on top of the large coffee can to capture water that will drain from the paper. Place the form (small coffee can or wooden frame) on top of the screen.
3. Slowly pour half of the pulp through the form until pulp touches the edges of the form. Save the remainder for another piece of paper.
4. Lift the form from the screen, with pulp remaining. Use cloth to gently blot the excess water from the paper, squeezing it also into can below.
5. Lift the screen (with the cloth remaining on top of the pulp) from the large coffee can. Flip the screen (with the pulp and cloth in place) onto cookie sheet. The cloth side will be on the bottom next to the cookie sheet. The paper pulp will be facing up.
Allow to dry overnight and peel paper from cloth.
More to Read
The biggest entertainment stories
Get our big stories about Hollywood, film, television, music, arts, culture and more right in your inbox as soon as they publish.
You may occasionally receive promotional content from the Los Angeles Times.


