Replace Tub Spout for a Better Shower
- Share via
Question: The bathtub knobs for hot and cold water are separate and there is a stopper to allow the water to go to the shower. When the stopper is pulled up, the shower works, but there is still water coming through the spout in the tub. How can I stop this water from going into the tub and redirect it to the showerhead?
Answer: Your showerhead and tub spout are connected to the same pipe. When you toggle the valve lever on the spout (the diverter valve), you redirect water from there to the showerhead.
Once in the redirected position, this type of valve often leaks to some extent. But if you are experiencing excessive leakage, you might want to replace the tub spout, thus ending up with a new valve, and possibly, less leaking.
Cleaning your showerhead also should help by improving the head’s ability to freely pass water. Clean the showerhead by filling a plastic bag with undiluted vinegar. Place the bag around the showerhead like a feedbag for a horse. Fully immerse the head in the vinegar.
Tie the open end of the bag in place around the shower arm with a twist tie or a rubber band, and let sit for 24 hours. Run the shower for about a minute once you remove the bag; it should run more freely.
To replace the tub spout, first determine whether the spout is held onto the plumbing pipe with a threaded connection or if it is a slip connection. Look at the underside of the spout. If there is a screw, remove it, and the valve should slip off.
If no screw is visible on the base of the spout, simply turn it counterclockwise and unscrew to remove it. If a screw exists and you can’t seem to slip it loose, try unscrewing it. Some have both a threaded connection and a retaining screw.
There is no better diverter than the kind that works exactly like the hot- and cold-water valves themselves. Single valves are available for this purpose. Unfortunately, installing such a valve could be expensive because you would have to gain access to the wall interior.
Pressure-Treated Lumber
a Danger in the Garden
Q: I am planning to use pressure-treated landscape timbers for a raised vegetable garden. Others have told me that I need to be concerned about the chemicals that may leach out and affect the vegetables. Should I be concerned? What chemicals may leach out? Do you know if these chemicals are likely to be transferred into the food I plan to eat?
A: There is a danger using pressure-treated wood to surround a garden. Pressure-treated lumber is injected with chemicals--the most common of which is copper chrome arsenate--that resist damage by moisture and pests. There are several degrees of concentration of the chemical, depending on the intended use of the wood.
For example, fence posts that will be underground contain a higher concentration of the poison than do fence boards that will not be used underground.
But the degree of concentration is academic when it comes to any possibility of ingesting the chemical. The companies that make pressure-treated wood will tell you that it is safe for deck surfaces and furniture.
We disagree. Anywhere that a toddler who chews can easily gain access to pressure-treated wood, we feel, is cause for concern.
We think that pressure-treated lumber is superior to any other kind for use outside (deck framing--not the finished decking) or in contact with the earth or other regularly wet surfaces (retaining walls, foundation mudsill, and such).
If it were our garden we would use plain wood. Cedar and redwood are good choices.
Oil-Base Primer May
Stop Crackling Effect
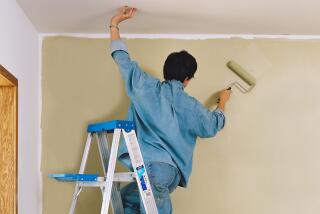
Q: My husband and I recently bought a 100-year-old home. In the process of painting the plaster-walled library, we’re running into problems.
The walls were triple-painted in a brush pattern--we think within the last 10 years. We bought flat paint and proceeded to apply two coats. After letting them dry we noticed dark stripes down the walls, and the whole surface is crackling in 1/8-inch pieces.
We went to the hardware store where we bought the paint and explained our problem. We bought a new primer and primed the entire room. Now the primer is doing the same thing as the other coats--as is a small spot where we test-painted over the primer. What can we do now?
A: We assume the three-color painting detail to which you refer is sponge or splatter paint. We make this assumption because the glaze that is used with sponge or splatter paint--once painted--will render the crackling effect you describe.
Now that you know the cause of the problem, you need to eliminate it. There are several ways to do this: You can sand, but that’s messy. You can use paint remover--even messier. Or, you can paint with a material that will not be affected by the existing glaze. This would be the easiest way.
Try applying a coat of oil-base primer to a 2-square-foot area. Water-base will not work. Once it’s sealed with the oil-base primer, any kind of finish coat can be used. If the oil-base primer doesn’t work, cover the walls with a quarter-inch-thick layer of gyp board.
