Crafty before it was cool
- Share via
Project ALABAMA was about ecologically conscious, socially conscious fashion before it was, well, fashionable.
In 2000, Natalie Chanin -- after 20 years’ designing in New York and Europe -- came home to Florence, Ala., and began producing a line of stunning clothing made from recycled fabrics. She employed talented local quilters and seamstresses, who once worked in the area’s defunct textile plants, to make intricately appliqued and painted corsets, T-shirts and evening wear that earned high praise in the fashion world, but not enough income to sustain the brand.
Now the fashion world has caught up with Chanin -- just check out the homespun, DIY aesthetic at Rodarte and the other fall runways right now. And Chanin is back with a new label, Alabama Chanin, and a new how-to book, “Alabama Stitch Book.”
The book, written with Stacie Stukin, an occasional contributing writer to Image, is filled with projects, tips, essays and beautiful photography by Robert Rausch. Chanin includes fold-out patterns, detachable stencils, even her son’s favorite biscuit recipe. Yet for all its folksy charm, “Alabama Stitch Book” is both on-point, filled with practical guides and easy-to-read instructions, and surprisingly sophisticated.
Chanin’s designs-- based on recycled T-shirts and organic cotton, featuring leaf and flower stencils -- are tremendously suited to home sewers with creative impulses. All it takes is a drawer of old T-shirts or a set of ordinary white sheets, a trip to the craft store and the artistic license of Chanin’s book to create something truly beautiful.
And Chanin’s designs are as much fun to make as they are to wear. They’re a lot like a kids’ art project -- if your kids love “Project Runway” as much as mine do.
The techniques and patterns are forgiving. Those not handy with a needle and thread can simply stencil a pattern onto a T-shirt and stop there, or maybe add a vertical line of cursive script with a Sharpie. Beginning sewers can tackle an easy reverse applique, while the more advanced can stencil and applique a more intricate pattern.
Chanin is practical, economical, inventive -- and inspiring. Who knew you could do so much with old cotton jersey, paint and a Sharpie? (And who knew that’s about all you need to make one of the gorgeous Alabama Chanin shirts that go for $150 at Barneys?)
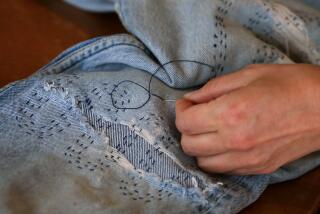
I’d never stenciled before, but after spending a few days with her book, I was transferring stencils up the sides of my daughter’s jeans, sewing leaves and cutting out roses and writing cursive lines of Shakespeare on her T-shirts.
We might not have abandoned cotton mills, but we had a drawerful of abandoned cotton T-shirts. Not anymore.
--
--
(BEGIN TEXT OF INFOBOX)
How to make a reverse applique T-shirt
Adapted from “Alabama Stitch Book” by Natalie Chanin
Time: About 3 hours, plus time for drying
Materials: 1 short-sleeve cotton T-shirt in your size, 1 cotton T-shirt or T-shirt scrap in a background color, lace stripe stencil pattern (at right), poster board, 1 can spray adhesive, craft knife, 1 jar of textile paint in the color of your choice, stencil brush or sponge brush; craft or quilting thread in color of your choice, embroidery scissors, pins, needle.
Note: Poster board, spray adhesive, craft knife, textile paint and brushes can be found at craft or art supply stores such as Dick Blick and Michael’s.
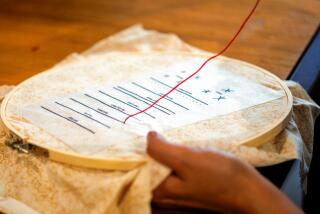
1. Prepare the lace stencil: Working in a well-ventilated area, spray the back of the paper stencil pattern (at right) with a light coating of adhesive spray and affix it to a piece of poster board. After the adhesive has dried, place the poster board with the design face up on a cutting board. Use the tip of the craft knife to cut out all the black areas and create a stencil.
2. Place the T-shirt that you’re using as a base on a work surface, front side up. Smooth out the surface area and place a protective layer of plastic or tin foil between the 2 layers of the T-shirt so the paint won’t bleed through. Apply a very light coating of spray adhesive to the back of the stencil to keep it in place, then position and press the stencil onto the right side of the T-shirt, so that the pattern runs vertically from the shoulder to the shirt’s hem.
3. Using a stencil brush or sponge brush, carefully paint the stencil design onto the T-shirt. Let the paint dry on the fabric and the stencil, then remove it, reposition and repeat as necessary so that the stencil design extends from the T-shirt’s bottom edge to the shoulder seam.
4. Meanwhile, cut a scrap of fabric from the second T-shirt so that you have a strip of cotton slightly larger than the stenciled area. When the paint is dry, turn the T-shirt inside-out and carefully pin the fabric strip to the wrong side of the base T-shirt behind the stenciled design. As you position the fabrics, make sure that the grain lines on both fabrics run in the same direction and that the scrap fabric’s right side faces the T-shirt’s wrong side.
5. Thread a needle with craft thread and tie a double knot at the end, leaving about a 2-inch tail of thread. With the T-shirt’s right side toward you, insert your needle on the right side of the fabric, so that the long tail remains visible. Using a straight stitch, carefully sew around the outside of one of the painted stencil shapes. When you arrive back at the starting point of the design, tie a double knot on the right side of the fabric and leave an inch or two of the doubled thread. Move on to the next shape and repeat until you have sewn around all of the stenciled shapes.
6. Being sure not to cut the fabric underneath, carefully separate the two layers on one of the reverse applique shapes and clip through the top layer only with your embroidery scissors. Insert the scissors through this clipped hole, and trim away the entire interior of the shape, leaving a 1/8 -inch margin of paint inside the stitching line. Continue clipping and trimming the top layer of all the shapes.
7. Follow the care instructions on the textile paint label, which may direct you to iron the design before you wash it.


