Can She Bake a Cherry Pie?
- Share via
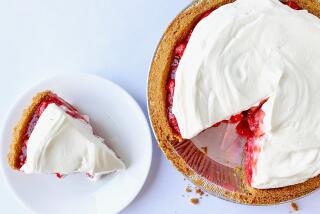
Fresh Cherry Pie is my father’s and my husband’s favorite pie. Fortunately for both of them, sour cherries come to market just in time for Father’s Day, so hardly a year goes by that I do not prepare at least one pie.
There is something wonderful about sour cherries. Their flavor is as pure and joyful as the piercingly clear song of a cardinal. They could be no other color but red.
The first pie I ever attempted was a cherry pie. It was during Thanksgiving break in my freshman year at the University of Vermont. As a city girl who had just learned the basic techniques of pie-making in class, I wanted to please and surprise my father. It turned out that everyone else in the family was surprised as well.
The oven in our apartment had never been used for anything other than storing pots and pans. My mother, who was afraid of lighting an oven that had been so long dormant, made a long “fuse” from a paper towel and took me into the living room, covering her ears. A few minutes later, when the flame reached the escaping gas, there was the loud explosion she had anticipated (and had, in fact, created unnecessarily).
Minutes later, my grandmother (whose domain the kitchen actually was) came running in, crying, “The soap, the soap!” It turned out that she stored her bars of dishwashing soap in the broiler under the oven. The soap, by then, was melted and bubbling.
But the worst surprise was yet to come. During the baking of the pie, the cherry juice started bubbling out of the pie and onto the floor of the oven, where it started to burn and smoke. The steam vents I had carefully cut into the top crust had resealed from the thick juices of the sugared cherries.
During Christmas break I tried again, this time discreetly lighting the oven myself (though I did forget to remove the soap again). My creative--though absurd--solution to the sealed vent problem was to insert little straws in them so the juices could bubble up and down without spilling over. Finally, I discovered that all that is necessary are little cut-outs, because unlike slits, they cannot reseal.
These days, though, I prefer a lattice crust. The fruit is simply too beautiful to hide.
Fine-ground tapioca in this pie gives thickened juices a smoother consistency. Tapioca works especially well with acidic fruit. It firms juices while keeping them slightly fluid and soft, unlike cornstarch, which has a slightly rubbery quality. Whether you use tapioca or cornstarch, juices will continue to thicken as pie stands.
Almond extract has a synergistic effect with cherries, giving them a more intense cherry flavor.
FRESH CHERRY PIE
Perfect Flaky Pie Crust Dough
1 1/2 pounds fresh sour cherries
3/4 cup plus 1 tablespoon sugar
2 tablespoons tapioca, finely ground in blender
Dash salt
1/4 teaspoon almond extract
1 large egg yolk
1 teaspoon whipping cream
Roll disc of dough 1/8-inch-thick into 12 1/2-inch circle. Transfer to 9-inch pie pan, allowing about 3/4-inch border to hang over edge of pan. Fold border under flush with outer edge of pie plate. Cover with plastic wrap and chill.
Remove pits from cherries, draining completely and reserving juice. Stir together sugar, tapioca, salt and cherry juice in medium saucepan. Add cherries and let stand at least 5 minutes. Bring to full boil over medium-low heat, stirring constantly. Remove from heat and stir in almond extract. Cool completely. Do not stir.
Roll remaining dough 1/16-inch thick into 11x7-inch rectangle. Using ruler and pastry jagger, cut into 12 strips, each 11 inches long and 1/2-inch wide.
Pour cherry filling into chilled pie shell. To create woven lattice top, arrange 6 strips of dough evenly over cherries, running in same direction. Gently fold back every other strip almost to center. Place another strip in opposite direction across 3 unfolded strips. Replace folded-back strips to lie flat on top of this strip. Fold back 3 strips not folded back first time. Place another strip across 3 unfolded strips, slightly closer to edge of pie, and unfold folded strips across it. Continue in this manner with another strip of dough, folding back 3 strips that were folded back first time.
Follow same weaving method with remaining 3 strips on other half of pie. Trim strips to 1/2-inch overhang. Moisten under each strip with water and tuck overhang under bottom-crust border, pressing down to adhere. Mix egg yolk and whipping cream and use to brush lattice and border. Chill 1 hour.
Place pie on top of oven stone or baking sheet on bottom rack of oven. Bake at 425 degrees until bubbling, 40 to 45 minutes. Cover edges with foil after 15 minutes of baking.
Cool at least 3 hours before serving. Store pie, uncovered, at room temperature. Pie will keep 2 days. Makes 6 to 8 servings.
Each serving contains about:
475 calories; 238 mg sodium; 48 mg cholesterol; 19 grams fat; 73 grams carbohydrates; 6 grams protein; 0.53 gram fiber.
Very tender pie crusts are never flaky: very flaky pie crusts are always tough. But here, at last, is the perfect combination, which I have been working on for years--just the right degree of flakiness and tenderness. As a bonus, this special method is delightfully easy and foolproof.
The food processor method is the easiest, because the dough gets handled less and stays more chilled, but the hand method will produce an equally good crust.
Be sure to keep the ingredients cold to maintain flakiness. In summer I pour flour into a reclosable freezer bag and chill it in the freezer at least 30 minutes before mixing the dough.
Perfect Flaky Pie Crust Dough
9 tablespoons unsalted butter
1 1/2 cups bleached all-purpose flour
1/2 teaspoon salt
3 to 4 tablespoons ice water
Divide butter into 2 parts, about 2/3 portion and 1/3 portion. Cut butter into 1/2-inch cubes, keeping 2 portions separate. Wrap each set of butter with plastic wrap and chill at least 15 minutes.
For food processor method, place flour and salt in food processor with metal blade and process few seconds to combine. Add larger portion of butter cubes to flour and process until mixture resembles fine meal, about 20 seconds. Add remaining butter cubes and pulse until remaining butter is size of small peas, about 20 times.
Add 3 tablespoons ice water and pulse 6 times. Pinch mixture together between fingers. If it does not hold together, add another 1/2 tablespoon water and pulse 3 times. Pinch again and, if necessary, add remaining 1/2 tablespoon water, pulsing 3 times to incorporate it.
Transfer mixture into plastic food bag and press together with hands (from outside of bag) until it holds together. Knead dough briefly in bag until it forms smooth ball. Remove dough from bag and divide into 2 parts, about 2/3 and 1/3. Wrap each portion in plastic wrap. Flatten larger piece into disc and smaller piece into rectangle. Chill dough at least 45 minutes before rolling out.
For hand method, whisk flour and salt in medium bowl to combine. Use pastry cutter or 2 knives to cut larger portion of butter cubes into flour until mixture resembles fine meal. Add remaining 1/3 portion of butter cubes and cut into flour mixture until butter pieces are size of small peas.
Sprinkle on 3 tablespoons ice water, tossing mixture lightly with fork. Pinch mixture together between fingers. If it does not hold together, add another 1/2 tablespoon water and mix lightly. Pinch again and, if necessary, add remaining 1/2 tablespoon water.
Use hands to gather dough together and knead briefly on counter until smooth ball is formed. Divide into 2 parts, about 2/3 and 1/3. Wrap each portion in plastic wrap. Flatten larger piece into disc and smaller piece into rectangle. Refrigerate dough at least 45 minutes before rolling out.
Dough will keep in refrigerator up to 2 days and in freezer up to 3 months. Makes enough pastry for 1 (9-inch) pie crust and lattice top.
More to Read
Eat your way across L.A.
Get our weekly Tasting Notes newsletter for reviews, news and more.
You may occasionally receive promotional content from the Los Angeles Times.


