Saigon-Style Banh Mi

- Share via
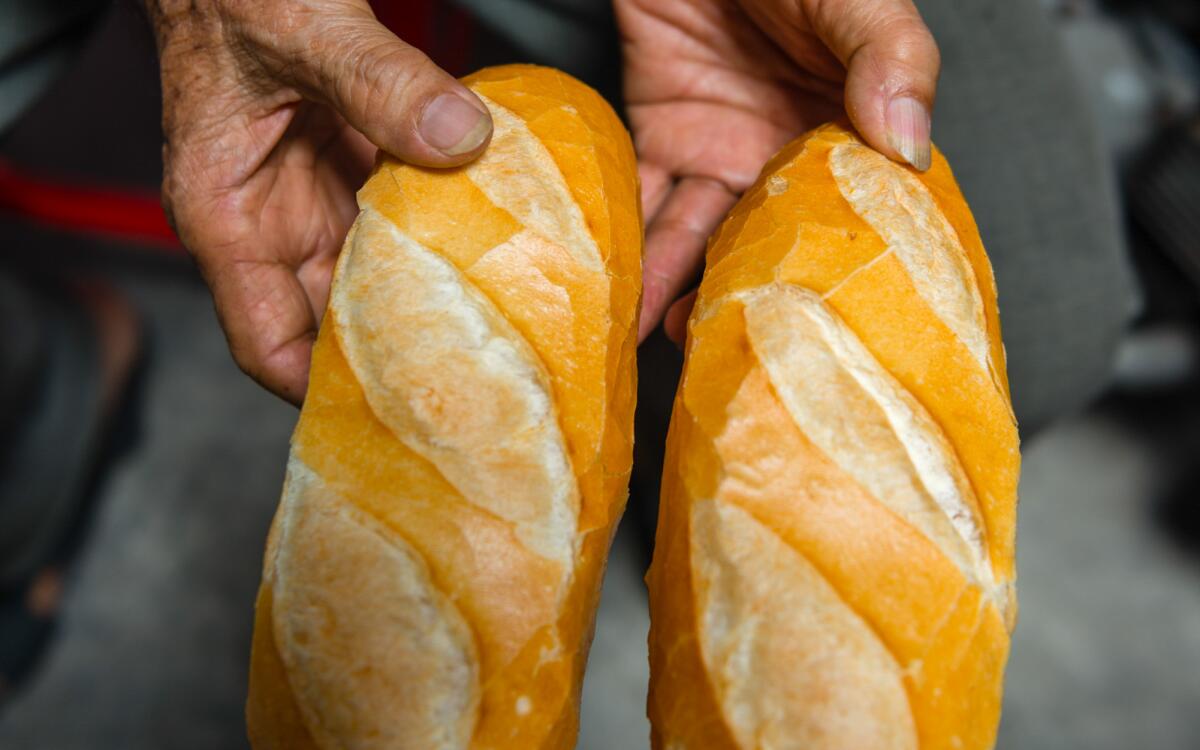
“In Saigon, the loaves we encountered were blimp-like in shape, light as a feather, cottony on the inside with a crispy, eggshell-thin crust. Replicating these loaves at home is difficult but not impossible.
“There are many factors that come into play at the Saigon bakeries: mixtures of several different purpose-milled banh mi flours of varying protein percentages and additives; the humidity and temperature of the bakeries; the hydration level of the dough; and probably the most important factor, the skill of the baker. You have to see these guys in action; they are amazingly talented, especially in the rapid slap-and-roll shaping of the baguettes.
“The intensive mixing regimen is also important and cannot be achieved without machinery or superhuman strength and speed. It involves whipping the dough with a spiral mixer at an absurd RPM for a short period of time. This takes the place of the multiple rise and fold cycles that would normally develop the gluten, and can be approximated using the hook and paddle attachments of a stand mixer.
“The following recipe is as close as I have been able to come to reproducing the modern banh mi. There are likely to be discrepancies with the equipment you own, the flour available and hydration level given the environment in your kitchen, so don’t expect perfect or even acceptable results out of the gate; it took me a couple dozen tries to get this down. If nothing else, this will give some insights into how professional banh mi bakers achieve the results they do.” — Andy Ricker, chef-owner of Pok Pok restaurant in Portland, Ore.
Strong bread flour with a protein makeup of 12% to 13% and dough improver, a treatment agent that keeps dough from getting too tough to work with, are two essentials to making authentic banh mi rolls. You can use all-purpose flour as a substitute for bread flour, but the resulting loaves will be drier. Do not try to substitute the dough improver for its organic or natural cousins; its stabilizers and chemicals are what help give the baguettes their characteristic texture. If you have a convection oven setting, use it; the extra boost of hot air from the fan will help the loaves rise higher and attain a fluffier crumb than when baked in a conventional oven.
In the bowl of a stand mixer fitted with a paddle, add the flour, yeast, dough improver, salt and sugar and whisk to combine. Pour in the water, turn the mixer on its lowest speed and mix for 1 minute. Remove the paddle attachment and replace it with the hook. Turn the mixer to its highest speed and knead the dough until it is smooth and slaps the side of the bowl, at least 6 minutes.
Using a pastry brush or wad of paper towels, brush oil liberally into a round cake pan or flat-bottom bowl. Oil your hands and pull the dough from the mixer and put it in the pan. Pat down firmly to knock out any air bubbles and to shape into a flat round mass about 1 inch thick. Flip the dough in the pan and pat down again.
Lightly grease a clean work surface, then transfer the dough to it. Using a bench scraper or knife, cut the dough into 12 equal pieces, about 70 grams each. Place one piece in front of you on the surface and move the other 11 off to the side and cover loosely with a sheet of plastic wrap to keep them from drying out.
Starting with one piece, grip one end of the dough in your hand and fling the other end, slapping it against your work surface to stretch it slightly. Fold the top half of the dough back toward you, then press it with the heel of your hand to flatten into a rough rectangle. Then, starting with one long side of the rectangle, roll the dough up into a log, as if you were making a log of cinnamon rolls. The dough log should be about 8 inches long and 1 inch wide.
Starting at the center and working toward the ends, roll the log under your fingers, stretching it slightly and pressing at the ends to create sharp tapers. (This part is tricky, so watch this video to acquaint yourself with the maneuvers and see the desired shape before your first try.) Repeat with the remaining dough pieces, transferring each as it’s formed to a concave baguette pan (highly recommended; you’ll need three for this recipe) or on a baking sheet lined with parchment paper (two will suffice). If using the latter, be sure to space the loaves out by a few inches and lift the paper slightly between each loaf so they don’t become conjoined while rising. As the dough rises, mistakes are forgiven, so if you do this step fairly quickly and consistently, you’ll end up with serviceable if not slightly misshapen baguettes.
Place the pans or baking sheets in a cold oven. Fill a 9-by-13-inch pan halfway with boiling water, then place the pan on the bottom of the oven. Close the oven door and let the baguettes rise until doubled in size, 30 minutes to 1 hour.
Remove the pans or baking sheets from the oven and leave the pan of water where it is. Heat the oven to 500 degrees, keeping the door closed to trap the moisture from the water in the pan.
Using a spray bottle, spray the entire surface of the baguettes with a fine mist of water. Using a greased razor blade or sharp paring knife, quickly slit the top of each baguette three times on a bias; space the cuts evenly and cut no more than 1/4-inch deep. Place the pans in the oven and set a timer for 15 minutes. After 2 minutes (at the 13-minute mark on timer), open the door and quickly spray the loaves with more water, then close the door. Repeat once more after 3 additional minutes (10 minutes left on timer). After 8 additional minutes (7-minute mark on timer), rotate the pans front to back and top to bottom so the loaves bake evenly. Continue baking until the loaves are dark golden brown, 15 minutes total.
Remove the pans from the oven and place on a rack. Allow the baguettes to cool completely on their pans. If all has gone well, the loaves should crackle and pop as they cool and the crust will form spider webs of little cracks. The resulting loaf should be light, crispy on the outside and moist and cottony on the inside. Use right away to make banh mi sandwiches.
Get our Cooking newsletter
Get a taste of Los Angeles — and the world — with recipes and kitchen tricks from the L.A. Times’ Cooking newsletter.
You may occasionally receive promotional content from the Los Angeles Times.


