Jocko’s-style pinquito beans
- Share via
Last Father’s Day weekend if you were near Jocko’s steakhouse in Nipomo, Calif., and wondered about the people streaming out the front door carrying gallon to-go containers of who-knows-what, the answer to your query would be pinquito beans.
The entrée portion on every Santa Maria-style steakhouse menu involves thick cuts of meat cooked on an iron grill over flaming coals of native red oak. Pinquito beans are an essential side dish (along with salsa, saltines, garlic bread and an icy relish tray).
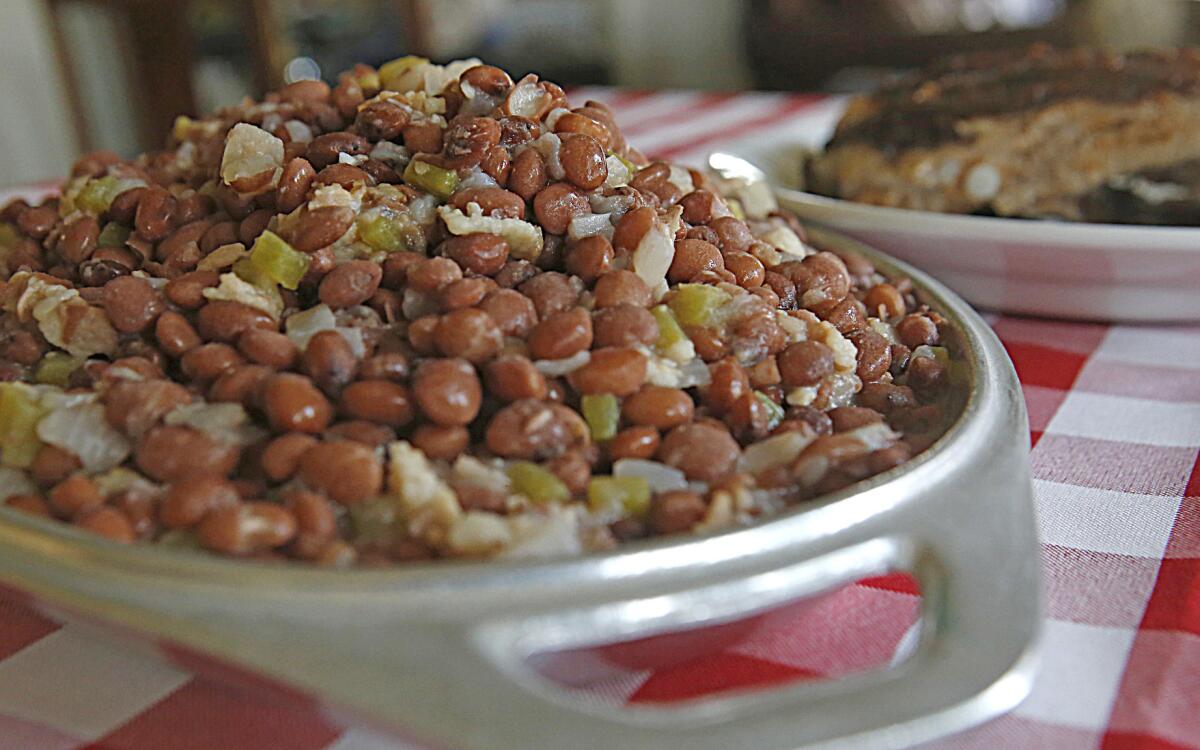
Pink in color, roughly the size of a seed pearl and exclusively grown in California’s Central Coast, pinquitos arrive in a brothy bowl with every order of peppery tri-tip or Spencer steak, and in the morning make a command performance at Jocko’s with your eggs, pork chop and fresh-baked biscuit breakfast.
It is often said that the pinquitos were introduced to the area over 100 years ago by Spanish vaqueros. There’s also a completely different narrative that gives credit to migrant farmworkers who brought beans with them from south of the border.
“They just kind of grow out here, special to this region,” says Eric Spies, general manager at Shaw’s Famous Steakhouse, where for eight hours they “just cook the heck” out of their pinquitos, seasoning them with chiles, bacon, onions, garlic and scraps of tri-tip. “Even the old-timers here, they aren’t sure of the true original story.”
A bit of official-sounding pinquito history that’s shared — at least by Jocko’s manager Ed Fitzpatrick, as well as the Santa Maria Chamber of Commerce — is how back in the mid-’50s “Bunny” Porter, owner of the family-run Alamo Farming Co., started growing them when a buddy brought him some dried pinquitos from Mexico.
“If I got the story half right, [Bunny] brought them to Fred and George [Knotts, who inherited Jocko’s from their father] and said, ‘I think these beans would be great for your restaurant,” says Fitzpatrick, adding that they still get their pinquitos from Alamo Farms, which has been growing them now for three generations.
One bit of bean consensus is that the pinquito, which is planted from mid to late May and harvested in late September, flourishes on the Central Coast. “It’s the cooler climate — certain beans are sensitive to warm nights — and the [fertile] soil,” says Steve Sando, founder of Rancho Gordo, a specialty producer of heirloom beans. Sando, who has written three bean books and has been selling pinquitos for over a decade, got his first taste as a young boy when, during family road trips, they’d swing by CYO (cook your own) tri-tip barbecues thrown by Santa Maria’s legendary Elk’s Lodge No. 1538. “I’ve never tried growing pinquintos out of the Central Valley. They do so well there and it just seems sort of wrong.
“The funny thing is that they’re the same family as the kidney bean — phaseolus vulgaris — but they don’t taste anything like them; they’re 10 times better,” Sando says. “They’re unusual in which they’re sort of meaty, have a thin skin, but really hold together, and they exude a really distinctive, delicious bean broth for pot liquor.”
Part of Sando’s mission is convincing his customers to keep it as simple as possible when cooking heirloom beans. A pot of pinquitos, he believes, should involve nothing more than some soft, sautéed onion and garlic, water, beans and a bay leaf, cooked at a very low boil until done.
“People will go, ‘Oh, yeah. I just threw in a ham hock,’” says Sando with a groan. “That’s no longer a bean dish – that’s a pork dish. That’s a waste of an heirloom bean.”
It’s easy to find pinquito recipes online, passed from family member to family member, that teem with components, calling for dry mustard, ketchup, paprika, sugar, oregano, ground sage, diced tomatoes and chipotle en adobo; there’s a chest-thumping carnivore’s version that includes not just bacon and ham but also chopped beef stew meat.
At Jocko’s, though, bean preparation is all about paying homage to the pinquito. It begins daily at 5 a.m., and simmering lasts for at least five or six hours.
“It’s nothing special — just salt, pepper, bacon, onion, spices, and a little bit of chilies, but not too much,” says Jocko’s Fitzpatrick. “It’s really the bean that’s the hero.”
Place the beans in a heavy pot and cover by 3 to 4 inches with water. Loosely cover, bring to a simmer, and gently simmer the beans until tender, 1 to 2 hours (timing will vary depending on the age of the beans). Drain the beans, reserving some of the liquid. Take a cup or so of cooked beans and mash. Place the beans back in the pot, stirring in the mashed beans and enough reserved liquid to moisten, and set aside.
When the beans are almost ready, fry the bacon in a skillet over medium heat until the fat renders out and the bacon is starting to brown. Stir in the onions and continue to cook, stirring frequently, until the onions are softened and beginning to brown, 20 to 30 minutes. Stir in the diced peppers, along with the garlic. Remove from heat.
Stir the bacon mixture in with the beans, and bring to a gentle simmer, stirring constantly. Add additional reserved liquid or water as needed to keep the beans moist, and cook for 10 or so minutes to marry the flavors. Taste, adding salt and pepper as needed to season. Remove from heat and serve.
Get our Cooking newsletter
Get a taste of Los Angeles — and the world — with recipes and kitchen tricks from the L.A. Times’ Cooking newsletter.
You may occasionally receive promotional content from the Los Angeles Times.


