Kenyan Chapati

- Share via
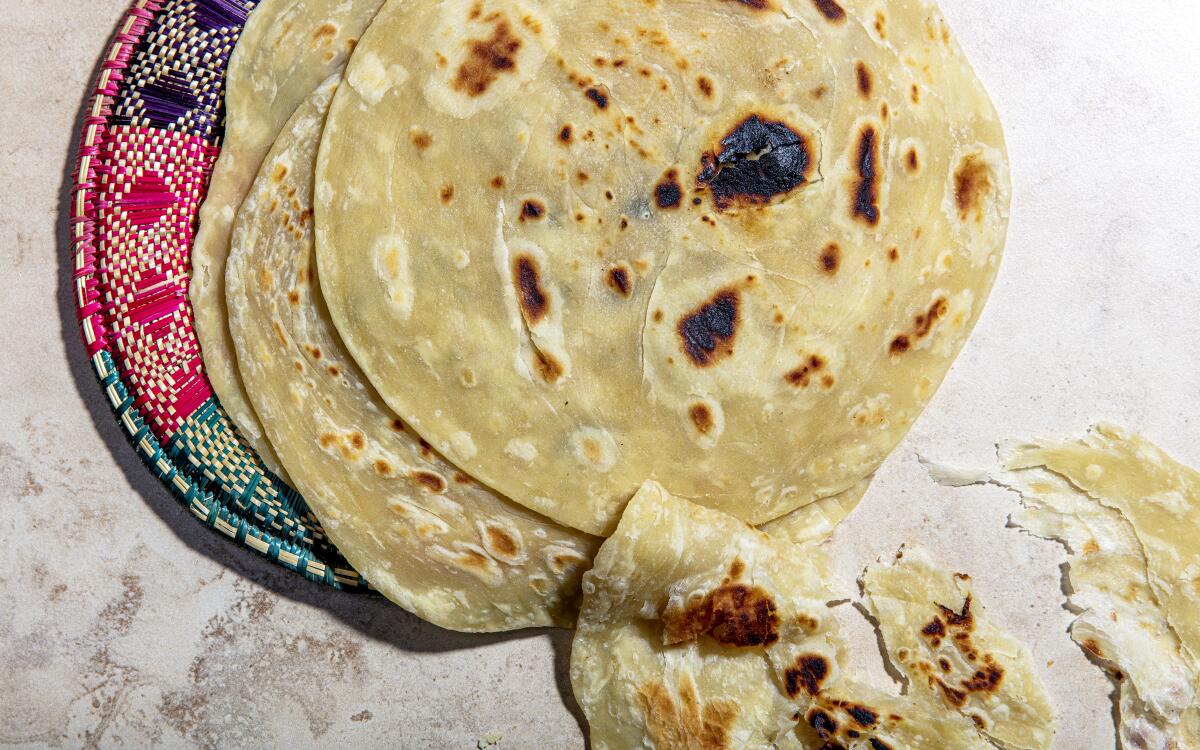
“Making chapati dough is not a dump-and-stir affair,” says Kiano Moju. “You need to smash dough to feel for hydration.” This technique for making these flatbreads yields exceptionally flaky dough, great for mopping up sauces and stews or for rolling around eggs and fillings to make rolex. If you want to make the chapati the day before you need them, use the Freezer Chapati variation, below. Chapati are best eaten immediately after being cooked.
From the story: Kiano Moju’s ‘Afri-Cali’ Christmas
In a large, wide bowl whisk together the flour and salt. In a liquid measuring cup, measure out 1 ¼ cups room-temperature water. Make a well in the center of the flour, then pour in 2 tablespoons olive oil and ½ cup of the water. Using your fingers, begin mixing the wet ingredients into the flour, rubbing the flour through your fingers in a pinching motion to form small, shaggy bits of dough and tossing the shaggy bits in the dry parts to keep them separate. Continue in this fashion, adding splashes of water to any large dry patches of flour and mixing in each before adding the next, until the shaggy pieces of dough start sticking together and there are no patches of flour left. Take your time here; the whole mixing process should take between 3 ½ and 4 minutes. After all the water is added, the dough should feel lightly sticky; if the dough still seems too dry, add up to ¼ cup more water, adding it 1 tablespoon at a time.
Transfer the dough to a work surface (or leave it in the bowl) and use your hands to gather it into a ball. Continue kneading the dough, using only a small dusting of flour to keep the dough from sticking to your hands, until the ball is elastic and smooth, 6 to 8 minutes. Using a bench scraper or sharp knife, divide the dough into 8 pieces and shape each into a ball. Grease the balls lightly with olive oil, then transfer them to a parchment paper-lined baking sheet and cover with plastic wrap. Let stand until soft to the touch, at least 1 hour.
Transfer one ball of dough (keep the rest covered) to a lightly floured work surface and use the heel of your hand to flatten into a disk. Use a rolling pin to roll the dough into a round as thin as possible, about 10 inches in diameter. Peel the round of dough off the work surface and use the tips of your fingers to gently stretch the edge of the dough as you rotate it until it’s paper-thin and you can see through it; be gentle here and let gravity do most of the work.
Once you’ve stretched the edges, place the dough over the backs of your hands and form your hands into fists that are facing each other and touching. Similar to stretching pizza dough, slowly separate your fists and let the dough drag along the backs of your hands to gently stretch until it’s paper-thin all over. (If the dough tears, don’t worry; it will happen on the first piece. Simply press any large tears together and any small tears can be left as is.) Lay the dough sheet on the work surface (you should be able to see your work surface through the dough) and use the rolling pin to roll over the outer ½-inch edge so it’s as thin as the rest of the sheet. The sheet should have a diameter between 13 and 16 inches when measured from different positions on the sheet.
Pour 1 tablespoon olive oil onto the dough and use a pastry brush or your fingertips to coat the sheet with the oil. Eyeball a 1-teaspoon pinch of flour in your fingers and sprinkle it evenly over the sheet. Starting from the bottom edge, roll the dough upward like a cinnamon roll, moving back and forth along it to shape it into a thin rope, making sure to keep each roll as tight as possible. Pick up the rope, then use your hands to compress it — like making a fist — along its entire length, lightly stretching the rope until it’s an even thickness along its entire length and is between 26 and 30 inches long.
Starting at one end, roll the rope up into a snail-like spiral and tuck the last 1 ½-inch end of the rope under the bottom of the spiral. Press lightly to adhere the end under the spiral, then return the spiral to the baking sheet where it rested before and cover with plastic wrap; there will be enough oil left on the baking sheet and plastic wrap to keep the spirals from sticking together. Repeat with the remaining dough balls and 7 tablespoons olive oil to make 7 more spirals, keeping track of the order you make them and returning each to its spot on the sheet. Let the dough spirals rest for at least 30 minutes or up to 2 hours. It will take you approximately 40 to 45 minutes from the start of the first ball to the last, so by the time you finish rolling the last spiral, the first one you made should be rested for over an hour.
Place one spiral on a well-floured work surface and gently flatten with the heel of your hand. Sprinkle with more flour, then use a floured rolling pin to flatten into an even 9- to 10-inch disk, 1/8-inch thick. Pick the disk up after each roll to ensure it doesn’t stick to the work surface and you get an even round. Place the disk on a sheet of parchment paper. Repeat rolling the remaining spirals, using flour as needed to keep the dough from sticking to the work surface or rolling pin, to make 7 more thin disks, stacking each on top of the last. Once all the disks are rolled and stacked, flip the stack onto another sheet of parchment so the first disk you rolled is now on top.
Heat a large nonstick skillet over medium heat. Pour the remaining ½ cup olive oil into a cup. Lightly brush the bottom of the skillet with some of the olive oil, then place one dough disk in the skillet. Start a timer counting up and cook the disk for 1 minute, or until it bubbles and the top is dry to the touch. Lightly brush the top of the disk with more oil (this should take 10 to 15 seconds), then use a large spatula to flip it in the skillet. Cook for 1 minute, brushing the top with more oil while it cooks. Flip the chapati again and cook for another 1 minute, brushing the top with oil while it cooks. Finally, flip the chapati a final time and cook for 1 minute more (from start to finish, it should take about 4 ½ minutes to cook). Flip the chapati out of the skillet and onto a plate; cover with another plate to keep warm. With the skillet still off the heat, brush the bottom with more oil, then return the skillet to the heat and add the next dough disk. Repeat cooking the remaining dough disks in the same fashion, stacking the finished chapati as they are done so they keep each other warm between the plates.
Chapati are best eaten immediately after cooking. Let leftover chapati cool completely and wrap individually in plastic wrap. Store in the refrigerator for up to 3 days or in the freezer for up to 1 month.
If making chapati to keep in the freezer, make the dough and form the dough disks through Step 7. Add one uncooked dough disk to a dry skillet and cook until no longer raw on the surface, about 20 seconds on each side. Transfer the disk to a cutting board and repeat with the remaining disks. Let all the chapati cool completely, then individually wrap each tightly in plastic wrap. Transfer the chapati to a storage bag and freeze for up to 1 month.
When ready to eat, remove the chapati from the freezer and let sit at room temperature for 10 minutes to thaw slightly. Proceed with cooking in Step 8.
Get our Cooking newsletter
Get a taste of Los Angeles — and the world — with recipes and kitchen tricks from the L.A. Times’ Cooking newsletter.
You may occasionally receive promotional content from the Los Angeles Times.


